The roof or other form of shelter rooftops are structural components that support the upper covering of a structure or other form of shelter. While its primary function is to protect against the elements, it can also be used to provide additional benefits such as safety, security, privacy, and insulation in addition to its primary function. This is why you can’t allow your roof to be left overlooked.
Roofs can be constructed using a wide variety of materials and shapes, depending on the requirements, the climate in which they are to be erected, the availability of supplies and experienced labor, and the span that must be covered.
You do not need to be a professional colorado springs roofering contractor to be a successful homeowner. When it comes to regular house maintenance and roof repair difficulties, though, you should be prepared with a few simple pointers. This is especially critical to consider when it comes to roofing. When you consider that the average shingle roof is projected to last approximately 20 years, understanding how to maintain your current roof, how to repair minor leaks, and when to call a professional can help you save money while also protecting your home and its contents.
Here we will be discussing 15 of the Best Roof Repair Tips you may want to know before you start doing the repairs on your own.
Tip #1: Always use shingles of the same color
You may only require a few shingles to be replaced, and you may assume that a perfect match in color, style, and brand is not necessary in this case. Minor variations in shingle type are frequently quite visible from a distance, despite the fact that they are minor. If you want to keep your property’s “aesthetic appeal” while avoiding depreciation, finding the appropriate fit is essential.
Tip #2: Make every effort to preserve shingles
Sometimes you may save old shingles to avoid having to do some roof repair works or acquire new ones or ending yourself in a situation where the shingles are no longer accessible as a result of the product being phased out of the market. In order to secure curled-up shingles, roofing cement can be used in conjunction with roofing nails. Moreover, even if they are brittle, they can often be softened with a heat gun so that they do not break when being pushed to the roof.
Tip #3: Be aware of the difference between repairing and replacing
If only a few sections of your roof are damaged, you may be able to complete a quick roof repair project. Avoid, on the other hand, wasting time and money on items that should be replaced instead. As a rule, there are several ways to tell the difference: bare shingles, clogged gutters, snappy or curling shingles that refuse to return to their original position, and the simple fact of age and an expired manufacturer’s warranty, to name a few.
Tip #4: Roof Leaks: what to look for
When you are trying to locate a leakage, start by looking upward from where you think the leak is coming from. Inspection of the roof for any penetrations should be the first item on the list. Items that puncture the roof are by far the most common source of leaks on a residential property. As a result, even on older roofing systems, leaks in open parts of continuous shingles are infrequent.
Roof vents, chimneys, dormers, and anything else that protrudes through the roof are all examples of penetrations. They can be located many feet above or to the right or left of the leak. If you have access to your attic, the most straightforward approach to finding a leak is to climb up there with a flashlight and search for evidence. Water stains, black spots, and mold are all possible. However, if access is restricted or the ceiling is vaulted, you will need to climb onto the roof and investigate the potential problem.
Tip #5: Detect difficult leaks using this trick
Seek assistance and climb up onto the roof to locate the leak using a garden hose if finding the leak is difficult. Start low and saturate the area immediately above where the leak is occurring in the house. Isolate pieces of the hose when you’re operating it.
For example, soak the downhill side of a chimney first, then each side, and lastly, the top on both sides of the chimney before continuing. You should allow your assistance to remain inside the house while you await the arrival of the drip. Initially, allow the hose to run at a single location for several minutes before moving it slightly higher on the roof. Specify that your assistant yells in the event that a drop is detected. This technique can take up to an hour or more, so be patient and avoid moving the hose too quickly during the process.
If running water does not reveal the precise position of the leak, do not be afraid to investigate further. Start by removing the shingles from the questionable area. They are not necessary because there will be proof of the leak, and you will be able to trace it back to its source without them. Felt paper that has become discolored as a result of water damage and even rotten wood can be found directly beneath and around a leaking roof.
Tip #6: Leak-Fixing Technique
Certain types of roof leaks can be difficult to detect. Every now and again, water will appear in a spot on the ceiling that is not exactly above the source of the leak. If your ceiling has a plastic vapor barrier between the drywall and the attic insulation, remove the insulation and inspect the plastic for flow stains before installing the insulation back in place. Water seeps through vapor barrier gaps, such as those found above ceiling light fixtures, on a frequent basis.
Look for shiners on minor stains that lack flow markings (shiners are small stains that reflect light). In this situation, when the roof sheathing was fastened to the rafters, a nail missed the frame part. In frigid attics, moisture from the rooms below condenses on cold nails. Climbing into your attic on a cold night may reveal this occasionally. Frosted nails have a white appearance. It’s a cycle: at night, the nails freeze, then melt and drip during the day. To resolve the issue, just clip the nail using a pair of side-cutting pliers.
Tip #7: Repairing Roof Vents
Examine plastic roof vents for damaged housings and metal roof vents for broken seams. While you may be tempted to simply throw caulk at the issue, this remedy will not stay long. There is virtually no way around this except to replace the broken vents.
Additionally, inspect the base’s bottom border for pulled or missing nails. Substitute rubber-washer screws for them. In most cases, you may pull the vent loose by removing nails from behind the shingles on both sides. Additionally, nails will run across the top of the vent. Generally, such may be worked loose without removing shingles. Rubber-washer screws are used to secure the bottom. Squeeze a bead of sealant beneath the shingles on both sides of the vent to secure them in place and to provide a water barrier. That is far more convenient than re-nailing the shingles.
Tip #8: Never completely rely on Caulk!
The use of caulk or roof sealant to repair a leaking roof is rarely successful — at least not for a long period of time. Whenever possible, you should try to fix a leaky roof using “mechanical” methods. In order to prevent leaks from occurring, it is necessary to replace or repair existing flashing rather than rely on any type of sealant to do so. If flashing is not an option, caulk should be used as a leak stopper only when it is not possible to utilize another material.
Tip #9: How to Repair Minor Holes
Insidious little holes in shingles can cause rot, leaky roofs, and other deterioration for years before any evident signs of a leak are visible. You can come across holes that were formerly used for a satellite dish, antenna mounting brackets, or almost anything else. Aside from that, any exposed or misaligned roofing repair nails must be removed, and any holes should be filled in. Small holes are simple to fix, but the roof repair does not require the injection of caulk into the hole as in the case of larger holes. You will be able to remedy this leaky roof problem with the use of flashing.
Tip #10: How to fix Leaks around Brick Chimneys
In the presence of brick chimneys, a wide range of unpleasant events can take place. In fact, there are simply too many to include in this essay in its whole. It is possible for galvanized steel flashing around chimneys to rust through, particularly at the bottom 90-degree bend, if the flashing is not properly installed. A simple, but somewhat long-term, remedy is to simply put new flashing beneath the corroded material and secure it in place with screws. Any seepage of water will be diverted in this manner. The most optimal approach, on the other hand, is to cut a saw kerf into the mortar and then replace the flashing.
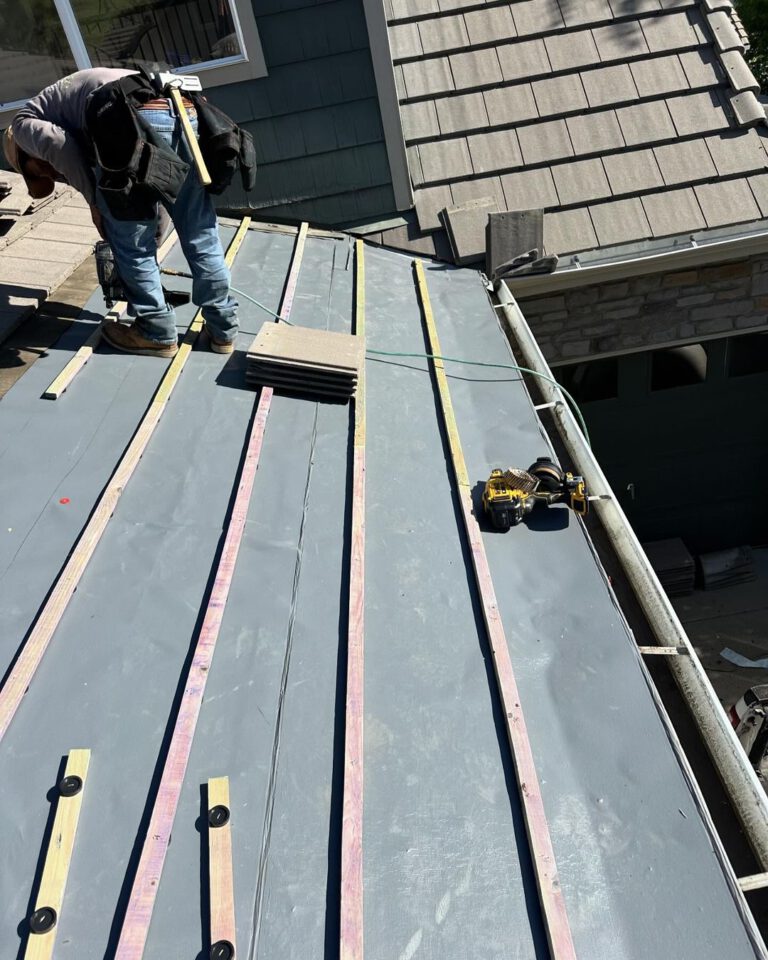
Tip #11: Use the proper protective equipment when repairing
Being on a roof is dangerous, and you’ll want to make sure you’re appropriately dressed in order to get access and make any necessary repairs. To begin, only attempt to climb onto your roof if you are confident in your ability to do so safely. A roof that has substantial damage and is in danger of collapse is made of tiles or another material that can split under the weight of a human, or is moist or slippery and should never be climbed on or around. The use of a ladder and the correct safety equipment is highly suggested if you do not already have them on hand.
If you have access to your roof, dress in long, heavy-fabric pants, such as jeans or work pants, to prevent slipping. Additionally, it is necessary to wear a long-sleeved shirt to protect your arms from the elements. It is essential to wear rubber-soled shoes with high traction when working outdoors. Wearing slippers or non-grip shoes increases the likelihood of slipping and falling, resulting in serious injury, and in some cases death.
Tip #12: Make sure Nail Heads aren’t exposed
Utilize rust-resistant aluminum or galvanized steel nails. However, ensure that all nails are concealed beneath the shingle just above the shingle they are in. If this is not possible, cover the nail heads with caulk or roof sealant.
Tip #13: How to fix Step Flashing
Along walls that intersect the roof, step flashing is used. Each short stretch of flashing directs water downhill over the shingle. However, if the flashing rusts through or a piece becomes detached, water will flow directly behind it and into the house. Replace corroded flashing. This involves removing shingles, siding, and step flashing. Occasionally, a roofer will miss nailing one in place, exposing the wall.
Tip #14: How to fix complex roof problems
This roof leaks during the snowy months of winter and during summer storms, very definitely as a result of inadequate flashing. The soffit where the roof meets the soffit is one of the most difficult regions to waterproof.
An ice dam forms when melting snow freezes on the cooler edges of your roof. As the water collects behind the dam, it finds its way back up through the roof shingles and soffit. The remedy starts with excellent flashing, which should block leaks from rain and ice dams. Remove the shingles to the wood sheathing and install an ice and water barrier strip under the soffit/main roof joint. Depending on how the roofs link, you may need to carve a slot. It should overhang another ice-and-water barrier down to the roof edge. This should cover the leakiest spots. Reveal metal step flashing under soffit board, reshingle (the trim behind the gutter). The valley flashing should overlap the step flashing by 2 in. If ice dams continue to cause leaks, attach roof edge heating cables. Improved attic insulation and ventilation normally avoid ice dams, but in this tricky leaky roof situation, they may not be successful.
Tip #15: Hiring the right roofer makes all the difference
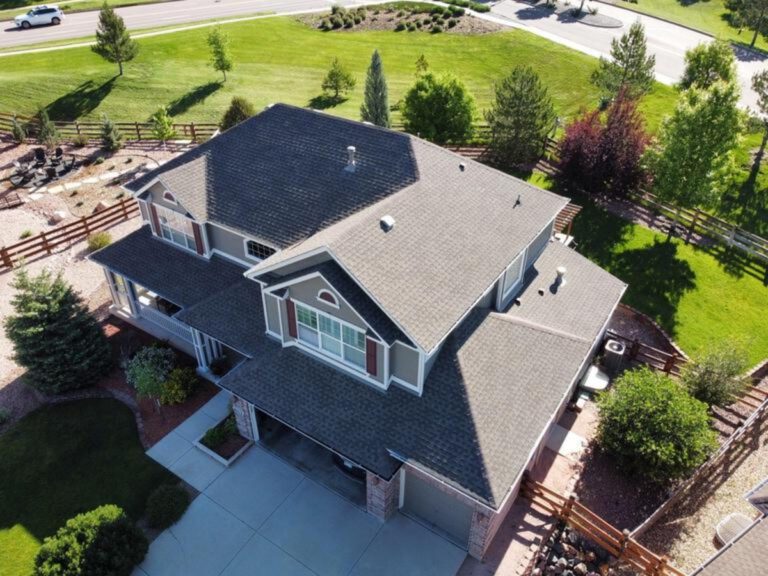
Although maintaining and protecting your home’s roof may appear to be a time-consuming and expensive task, your roof is often the most important structural component of your home. It should be regarded as a long-term financial commitment. This entails locating a reputable, experienced, licensed, and insured roofing contractor who can perform honest inspections, high-quality roof repairs, and value-added reroofing services while remaining within your budget. Spending a reasonable sum to hire a reputable contractor to complete the necessary work will provide you with a better value and a better result from the beginning of the project to completion.
Caution is the better part of valor, and overeating is never heroic. When you’re unsure how to remedy a roof problem, lack the time or experience to do so, or are unsure of your ability to do it safely, don’t hesitate to call in the specialists! Be sure to check on Raptor Roofing & Restoration, a professional group of roofers in Colorado Springs for your roofing service needs!
Raptor Roofing & Restoration is the #1 trusted roofer in Colorado Springs! Whether you need roof repair or replacement, they have the professional services you are looking for!
Their roofing, Colorado Springs service, is unmatched in the state of Colorado. Roof replacement adds value to your home and is critical for its safety. Their team will walk you through the entire process, from the initial inspection to providing a customized cost estimate. They will ensure that this experience is stress-free from beginning to end.
Their residential roof repair services are among the best in the area – not just in Colorado Springs, but throughout the region! A new roof may provide much-needed protection against severe weather events such as hail storms, so ensure that yours is regularly inspected by one of their certified professionals. Give Raptor Roofing of Colorado Springs a call at (719) 508-9045 or visit their official website